Preparing Windows 10 for Data Engineering or WSL(2) ❤ Windows Terminal
Recently I have to rethink the way how I use Ubuntu as the local sandbox environment. The common approach was to have a small-sized VM running in the VirtualBox or sometimes even a dedicated VM in Azure/AWS. However, Windows Subsystem for Linux (or WSL) sounds more and more often as the lightweight and easy-to-use alternative to dedicated VMs. So, I performed an exploration which eventually resulted in this blog post.
TL/DR
Apparently, WSL can be a fully functional alternative to side-by-side VMs and brings effectively two very different worlds of Windows and Linux together.
So, why spend time to get WSL working?
- WSL offers integration possibilities:
- Cross OS accessibility of files – Windows files are visible in BASH and the Linux filesystem is available in Windows CMD / Powershell
- The output of the Windows console app can be piped to Linux command (like
grep) and then piped back to another windows console application. - Visual Studio Code that runs on the Windows side can be configured to work natively with the files stored in Linux OS (this requires an extra plugin though).
- In general, WSL is more lightweight than a dedicated VM that runs on the same workstation.
- It shares the resources of the workstation and can use all hardware capacity when needed and then downscale if those resources not needed anymore:
- The VirtualBox usage scenario means that the part of CPU and RAM is allocated to the Linux VM and they are not available for Windows programs
- WSL starts in a second or two, while it takes sometimes minutes of waiting for the startup of a dedicated VM. Also it shutdowns in seconds
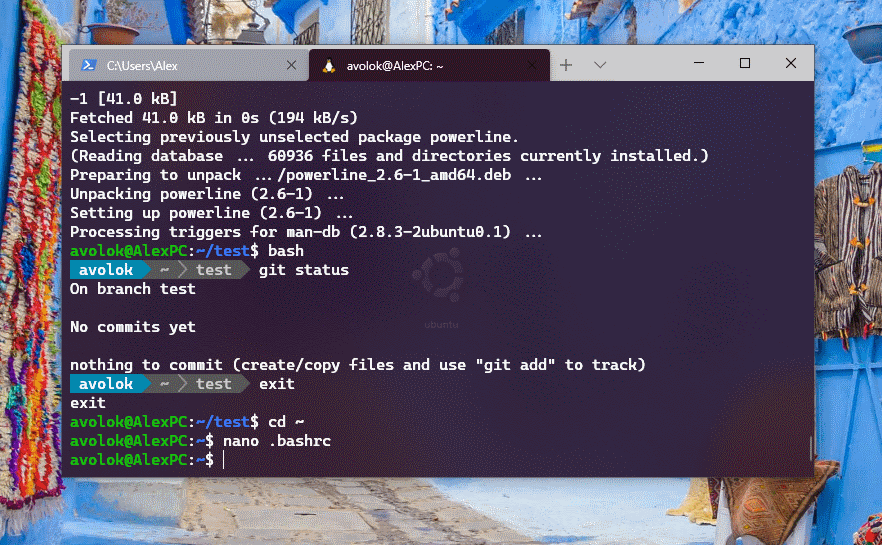
- Finally, WSL has a handy integration with Windows Terminal. For example, It automatically adds new profiles when the new distribution is installed. After small tuning (which will be covered later in this post) it can look like this:

Luckily, the installation process is fairly simple and documented well by Microsoft. However, there are few caveats related primarily to the corporate laptops that I will describe later.
Getting WSL and Windows Terminal working together
The installation process, described by me further in this post consists of three steps:
- Installation of Windows Terminal
- Installation and configuration of WLS
- Post-installation configuration of the Windows Terminal
Step 1. Installation of Windows Terminal
The simplest way to get Windows Terminal installed is to obtain it via Microsoft Store. Then, the application will also be periodically updated in case of new versions.
Some organizations limit or fully block the access to Microsoft Store. In this case, the app still can be installed by downloading it from the official GitHub release page: microsoft/terminal · GitHub
Luckily, the installation is a fairly simple process: just download .msixbundle and run it. This installation does not require local admin rights.
Step 2. Installation and Configuration of Windows Subsystem for Linux
Local admin rights
Here is sad news. The installation of WSL requires local admin permissions. These permissions are needed to enable required extra windows features. If this has to be done on the corporate laptop, perhaps you have to request temporary local administrator permissions or ask the IT department to help you by running two commands:
dism.exe /online /enable-feature /featurename:Microsoft-Windows-Subsystem-Linux /all /norestart
dism.exe /online /enable-feature /featurename:VirtualMachinePlatform /all /norestart
The remaining installation and configuration steps can be done by a non-privileged account.
Versions of WSL
Worth mentioning that there are two versions (or types) of WSL available and they can be switched from one to another:
- WSL, the original one which was shipped in 2017
- WSL2, released in 2020 and requires at least Windows 10 version 1903
Microsoft docs say:
We recommend that you use WSL 2 as it offers faster performance and 100% system call compatibility”
Comparing WSL 1 and WSL 2
so do I 😊. The primary difference is that the Linux kernel of WSL2 runs in the lightweight virtual machine, which results into:
- Increase in file system performance
- Support of full system call compatibility
More details and comparisons in that well-written article.
Installation steps:
The step-by-step installation is greatly explained by another doc: Install Windows Subsystem for Linux (WSL) on Windows 10 so I suggest following it.
For those, who have disabled/limited Microsoft Store – there is an extra how-to page on how manually download Windows Subsystem for Linux distro packages and then install it
When the installation is done, check if WSL running as expected by running in the command shell:
wsl –list –verbose
Their output is pretty verbose and shows we are ready with the installation:

WSL and http proxy
Some environments block direct access to the Internet in favor of using HTTP(s) proxy. Think of security gateways like zScaler or the corporate proxy servers. In this case, WSL distro by default will not be able to reach the Internet for the fresh package updates, new installations, etc.
The proxy settings to be set explicitly and the tricky part that some apps (like apt-get) have to be configured separately. These articles provide configuration help:
- How To Set System Proxy on Ubuntu 20.04/18.04 | Debian 10 | ComputingForGeeks
- Setting up Proxy in Ubuntu. This post is for complete newbies to… | by Raghuram Krishnaswami | Medium
Step 3. Configuration of the Windows Terminal
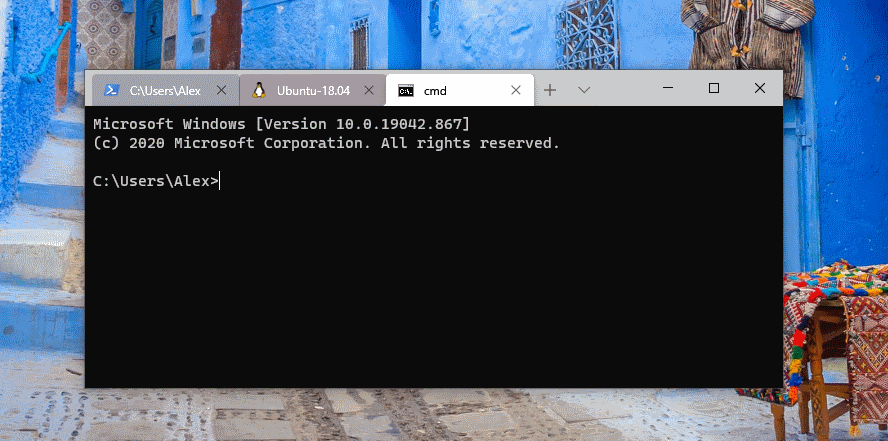
By default, the appearance of Windows Terminal is pretty similar to the default command shell. Perhaps it has just improved fonts with enabled anti-aliasing:

Luckily, its appearance can be tuned way further and can contain:
- Custom background images
- The powerline command prompt, which will show the current working directory and Git branch (if Git is initialized there).
- Acrylic transparency effects
Such a face-lifting is not a huge thing but it works stable, fast, and looks pleasant:

These appearance adjustments require a few final steps to be performed:
1. Download and install font Cascadia Code PL from the official repo: Releases · microsoft/cascadia-code · GitHub
2. Install the powerline package (using your Linux distro shell):
sudo apt-get install powerline
3. Add this line to the end of .bashrc:
if [ -f /usr/share/powerline/bindings/bash/powerline.sh ]; then
  powerline-daemon -q
  POWERLINE_BASH_CONTINUATION=1
  POWERLINE_BASH_SELECT=1
  source /usr/share/powerline/bindings/bash/powerline.sh
fi
then run to apply changes:
source ~/.bashrc
4. Change the Windows Terminal settings of the Ubuntu profile by editing settings.json
- Firstly, paste the code of the new theme into the section
"schemes": [ ]:
"schemes": [
  {
    "name": "Ubuntu",
    "background" : "#300A24",
    "foreground" : "#FFFFFF",
    "black" : "#2E3436",
    "blue" : "#0037DA",
    "brightBlack" : "#767676",
    "brightBlue" : "#3B78FF",
    "brightCyan" : "#61D6D6",
    "brightGreen" : "#16C60C",
    "brightPurple" : "#B4009E",
    "brightRed" : "#E74856",
    "brightWhite" : "#F2F2F2",
    "brightYellow" : "#F9F1A5",
    "cyan" : "#3A96DD",
    "green" : "#13A10E",
    "purple" : "#881798",
    "red" : "#C50F1F",
    "white" : "#CCCCCC",
    "yellow" : "#C19C00"
   }
]
- Then adjust the recently created Ubuntu profile by adding extra parameters, like tabColor, fontFace, fontSize, useAcrylic, etc:
 {
  "guid": "{c6eaf9f4-32a7-5fdc-b5cf-066e8a4b1e40}",
  "hidden": false,
  "name": "Ubuntu-18.04",
  "source": "Windows.Terminal.Wsl",
  "colorScheme": "Ubuntu",
  "tabColor": "#300A24",
  "fontFace": "Cascadia Code PL",
  "fontSize": 11,
  "backgroundImage": "C:\\Users\\Alex\\Pictures\\Saved Pictures\\ubuntu02.jpg",
  "backgroundImageOpacity": 0.1,
  "acrylicOpacity": 0.8,
  "useAcrylic": true
}
I do not place any links for background images, however they are easy googleable – “ubuntu wallpaper full hd” and all backslashes in the path to be escaped 👆.
That was it! Have fun! 🙂
