Azure Data Factory and REST APIs – Setting up a Copy activity
In this blog post, I would like to show how to add and configure a Copy Activity which will ingest REST data and store it in a data lake. The REST API used as an example in this post is secured with OAUTH2 authentication. It requires a Bearer token to be obtained and passed as an authorization header. Such a technique was already demonstrated by me in a previous post of the series: Azure Data Factory and REST APIs – Dealing with oauth2 authentication.
Prerequisites
This post does not cover the creation of a storage account. To proceed, an Azure Data Lake gen2 blob container has to be created because it will be used later as a sink destination by a Copy activity.
How Copy activity works
To use a Copy activity in Azure Data Factory, following steps to be done:
- Create linked services for the source data and the sink data stores
- Create datasets for the source and sink
- Create a pipeline with the Copy activity
The Copy activity uses input dataset to fetch data from a source linked service and copies it using an output dataset to a sink linked service. This process can be illustrated as a visual flow:

In the example picture two linked services created: REST and Azure Storage They act just like connection managers in SSIS.
The next abstraction is a Dataset. The Dataset is a named view of data that simply points or references the data that has to bed used in activities as inputs and outputs. SSIS has analogs in its dataflow – various sources and destinations.
And the final piece – Copy activity. It is a generic task that copies data among various data stores located on-premises and in the cloud.
Making Copy Activity working
To make a Copy activity working all three types of objects have to be created one by one, just as described in the following few steps:
Step 1. Create and Configure Linked Services
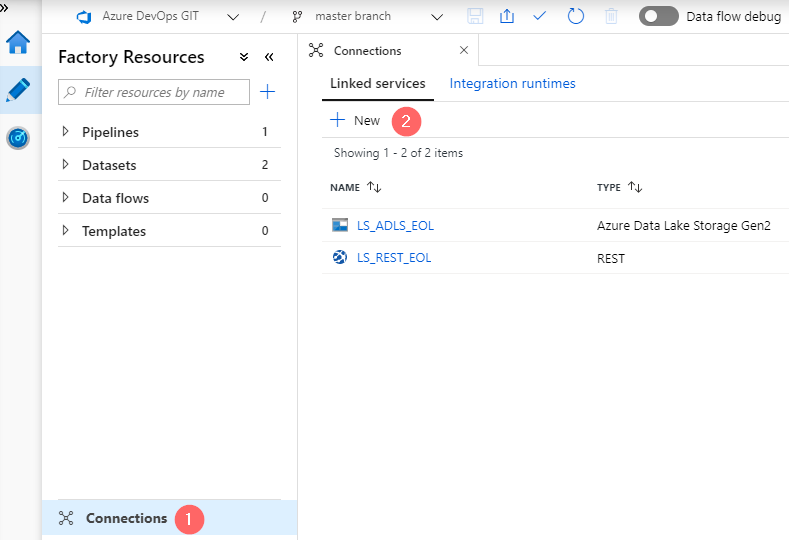
Go to Connections page (1) and click on “+ New” to create two linked services:
Linked Service 1, refers to a Data Source:
- Data Store: REST
- Name: LS_REST_EOL (1)
- Base URL: https://start.exactonline.nl (2)
- Authentication Type: Anonymous (3)
- Server Certificate Validation: Disable (4)

Linked Service 2, refers to a Data Sink:
- Data Store: Azure Data Lake Storage Gen2
- Name: LS_ADLS_EOL (1)
- Authentication Method: Account Key (2)
- Account Selection Method: From Azure Subscription (3)
- Choose the right subscription and account name (4)

Step 2. Create and Configure Datasets
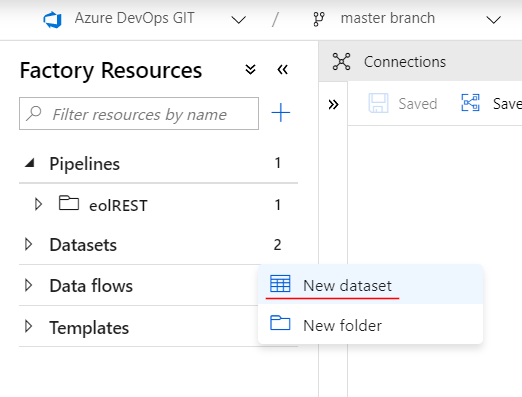
In this step two datasets to be created. One per corresponding linked service. Therefore, source and sink datasets. To create them, click on three dots that stands next to a Datasets in the left pane and then choose “New dataset” to add source and sink objects:
1. Create a source dataset:
- In a Data Store wizard search for a “REST”
- In a General tab give a name: “DS_SRC_REST”
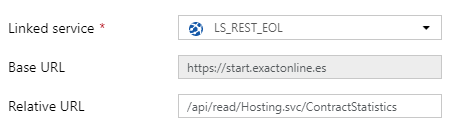
- In a Connection tab choose a linked service: LS_REST_EOL and set a relative URL: /api/read/Hosting.svc/ContractStatistics
2. Create a sink dataset:
- In a Data Store wizard search for a keyword “Data” and choose “Data Lake gen2”
- Choose the format type: Delimited Text
- Set a name: “DS_SINK_ADLS”
- Choose Linked Service “LS_ADLS_EOL”
- File Path: The first field receives a storage container name. In my case, it is “dwh”. The second field is for a folder name – “eol” and “contractstatitistics.csv” is a file name. Therefore, the full path is:
/dwh/eol/contractstatitistics.csv - Enable a checkbox: “First row as header”
- Choose None for “Import Schema”

Step 3. Create a Copy Activity
- Drop a Copy activity on canvas of a pipeline and give it a name “Ingest REST Data”
- Connect exiting “Login” activity with a just added one:

- On a Source Tab choose a dataset “DS_SRC_REST”. This will show new fields to adjust
- Request Method: “GET”
- Request Body: Should remain empty
- Add new request header:
- Name:
Authorization - Value:
Bearer @{activity('Login').output.access_token}
- Name:
- On a Sink tab choose a dataset:
- Choose a data source “DS_DEST_ADLS”
- Remain columns can remain as is
Step 4. Run a test execution
After setting up all dependent objects it is time to perform a test execution to validate that we are on the right track. Just like on a screenshot below, a button Debug to be pressed. This will trigger the execution of the pipeline:

- Click on Debug (1)
- Navigate to an output tab (2) and wait when all activities of the pipeline have a status other than “In Progress” or “Queued”
- When the execution of a Copy activity is finished, click on details button (3). This will open a modal window with a detailed information of a copy activity:
The window shows a flow of the data and it shows one issue: the activity read 1.8 MB from a REST, but written a few bytes only.
Storage Explorer confirms – the new empty file was created:

Such an output result can be explained by the fact that Mapping and Pagination are still not configured in a Copy activity. These two actions are going to be covered in the next blog post.
Final words
The second piece of the pipeline – a Copy activity was implemented. It establishes connections with a REST data source, and it tries to write data to Azure storage.
The REST data source outputs data in a JSON format, however, we specified to write data to the sink as a “Delimited Text”, therefore Mapping and Pagination also need to be implemented and it is covered in a next blog post – Azure Data Factory and REST APIs – Mapping and Pagination
Many thanks for reading.