Azure Data Factory & DevOps – Setting-up Continuous Delivery Pipeline
This is a final post of a DevOps series related to Classic pipelines, and I will touch here well-known practices: Continuous Integration/Continuous Delivery or CI/CD and how they relate to Azure Data Factory. It is a continuation of a one I published earlier: Azure Data Factory & DevOps – Integration with a Source Control.
Prerequisites
- Pre-configured development, test and production environments. They can be generated and configured by using scripts from those previous two posts.
- Source Control enabled development environment. The development environment should have already a source control integration configured. This aspect was illustrated in a previous post
So, what the term “CI/CD” for ADF development means?
Before going forward to a practical part it worth to walk-through a terminology and understand some limitations of the current implementation of Data Factory v2.
Continuous integration is a coding philosophy and set of practices that drive development teams to implement small changes and check-in code to version control repositories frequently. The technical goal of CI is to establish a consistent and automated way to build, package, and test applications.
What is CI/CD? Continuous integration and continuous delivery explained
Continuous delivery picks up where continuous integration ends. CD automates the delivery of applications to selected infrastructure environments. Most teams work with multiple environments other than the production, such as development and testing environments, and CD ensures there is an automated way to push code changes to them.
Azure Data Factory v2 currently has limited support for the Continuous Integration (CI) concept. Of course, developers can still perform frequent code check-ins. However, there is no way to configure automated builds and packaging of the data factory pipelines. This is because the collaboration branch (normally it is master) stores JSON definitions of objects, like pipelines, datasets, linked services. However, such objects cannot be directly deployed to data factory service before they are rebuilt to the ARM template.
There is one officially supported way to get such build triggered – a button “Publish” in Data Factory UI. This button runs a deployment and also it creates/updates another special branch in GIT: ADF_Publish. On a diagram this process is highlighted by a yellow color:

Some other teams tried to employ a PowerShell to trigger publishing programmatically. However, it didn’t work in their case and resulted into a SO thread: How to fix the data factory v2 adf_publish branch being out of sync with the master branch in azure devops
Therefore, by taking all these facts into account I have to conclude that the whole CI workflow cannot run in a fully automated way and some human interaction expected. And this makes CI flow limited.
Worth to mention that the Continuous Delivery process, which is highlighted by a green color on a picture above, works perfectly out of the box. As soon as adf_publish branch updated it can be configured to trigger the deployment of ARM templates to various Azure Data Factory environments.
This post has a focus on practical aspects of Continuous Delivery configuration. The configuration part is still manual and logically split into steps:
- Create a new release pipeline
- Create variable groups
- Create release pipeline variables
- Create a development stage
- Create remaining stages
- Map variable groups to stages
Azure Data Factory in production expects a usage of active triggers. They should be disabled before the deployment starts and then enabled again. More details and a sample powershell script in a section Sample pre- and post-deployment script of the official document.
So let’s start building a pipeline.
Setting up CD/CD
Step 1. Create a new release pipeline
- In Azure DevOps portal navigate to Pipelines -> Releases and click on a New pipeline:
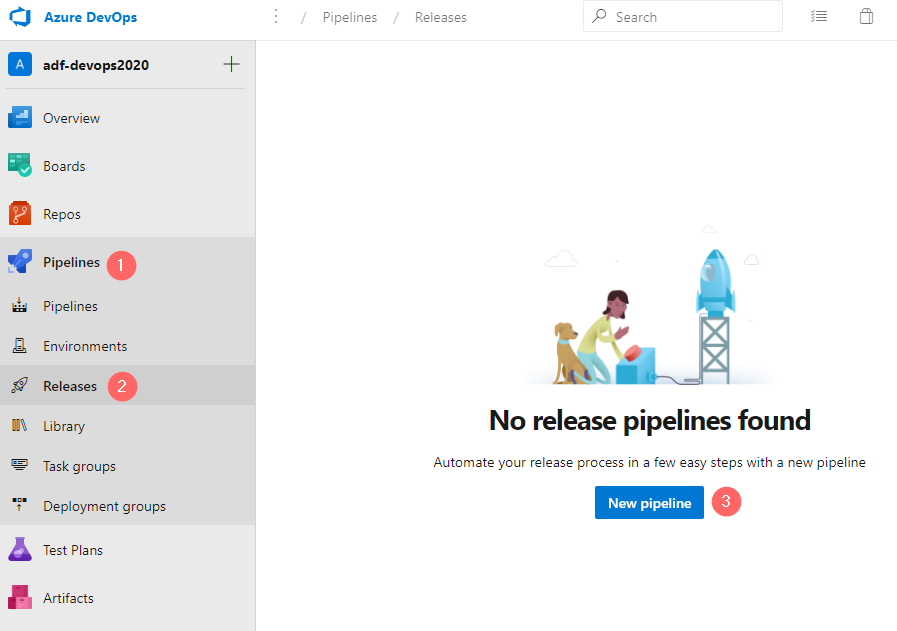
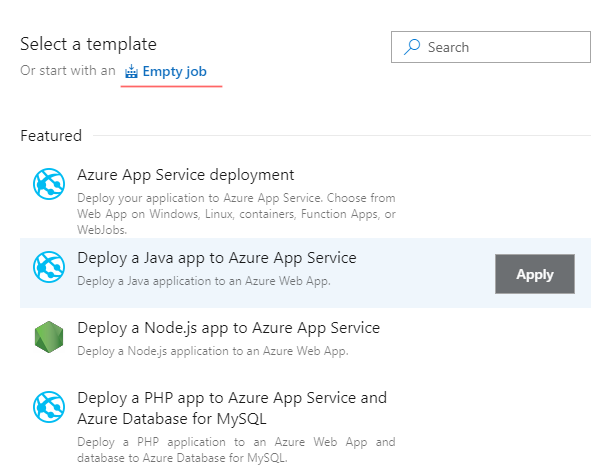
- “Select a template” window shows various pre-configured templates. In the case, of Data Factory, the choice is to create an Empty job:
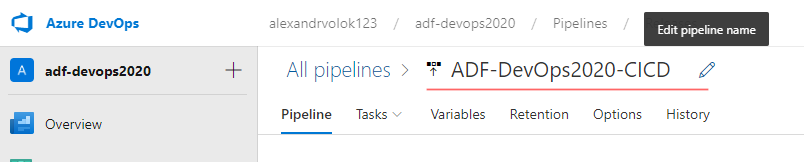
- Then, a meaningful name to be given. In my case it is: ADF-DevOps2020-CICD
- Create a new stage “Staging”:

By completes these a few simple steps we have a blank release pipeline created. Before it is fully configured with various tasks, let’s create variable groups and variables that will be used by tasks.
Step 2. Create variable groups
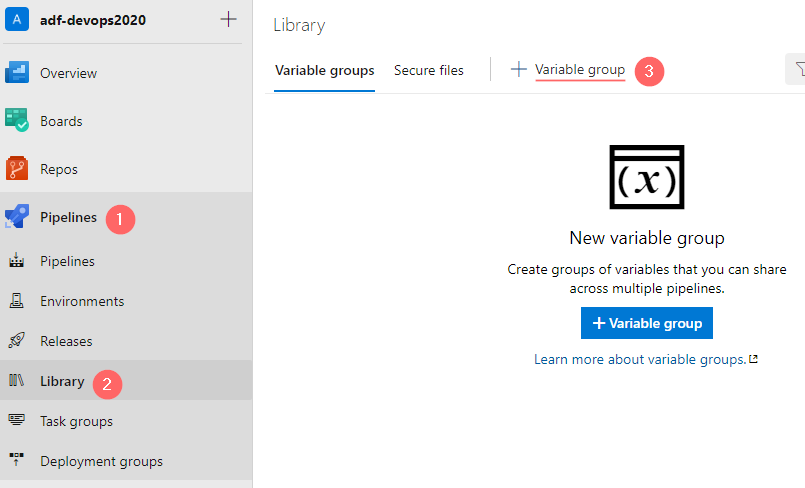
· Navigate to Pipelines -> Library and create a new variable group:
In a popup window:
- Enter a Variable group name: “Staging” (1)
- Add a new variable: “Environment” (2)
- Add value to the variable Environment: “stg”
- Save the changes (4) and click on Clone (5) to create another variable group

By pressing Clone in a previous step a new variable group window appears, however it contains prefilled data, so only a few fields to be changed:
- Variable group name: “Production”
- Variable Environment value to be set to “prd”
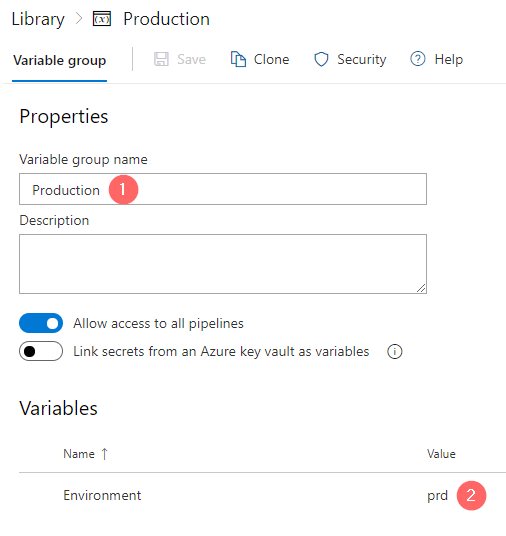
As a result, there are two variable groups created. Later they will be mapped to the corresponding stages.
Step 3. Create release pipeline variables
Let’s create pipeline level variables, they will contain environment-independent values, because of inheritance of values of variable groups. Therefore, the variable value will be adjusted to a stage where it used:
- Return to Pipelines -> Releases and then open tab Variables.
- Create the following four variables:
| Variable | Variable Value | Scope |
|---|---|---|
| resourceGroup | rg-adf-devops2020-$(Environment) | Release |
| factoryName | adf-adf-devops2020-$(Environment) | Release |
| LS_ADLS_BaseURL | https://adlsadfdevops2020$(Environment).dfs.core.windows.net/ | Release |
| LS_KeyVault_BaseURL | https://kv-adf-devops2020-$(Environment).vault.azure.net/ | Release |

- Press “Save” to keep recent changes
Step 4. Create and configure the development stage
Open again a pipeline tab and perform the following changes:
- Click on “Add an artifact” (1)
- In a pop-up window choose a “Source type”: “Azure Repos” (2)
- Select an Azure DevOps project name (3) and repository (4) where data factory source code placed
- Choose a default branch:
adf_publish(5) - Choose default version: “Latest from the default branch” (6)
- Set a Source alias: “Development”

These actions will create a Development stage. However, worth to repeat that the development environment is not really updated by a Continuous Delivery Pipeline. The real update role belongs to a button “Publish” in a ADF UI. This button triggers deployment to this environment and update of adf_publish branch. And then, adf_publish triggers Continuous Delivery Pipeline to deliver updated ARM template to other environments, like staging and production.
The following action will configure Continuous deployment trigger:
- Click on a lighting knob on a Development stage (1)
- Set continuous deployment trigger as enabled
- Set branch filter to
adf_publish
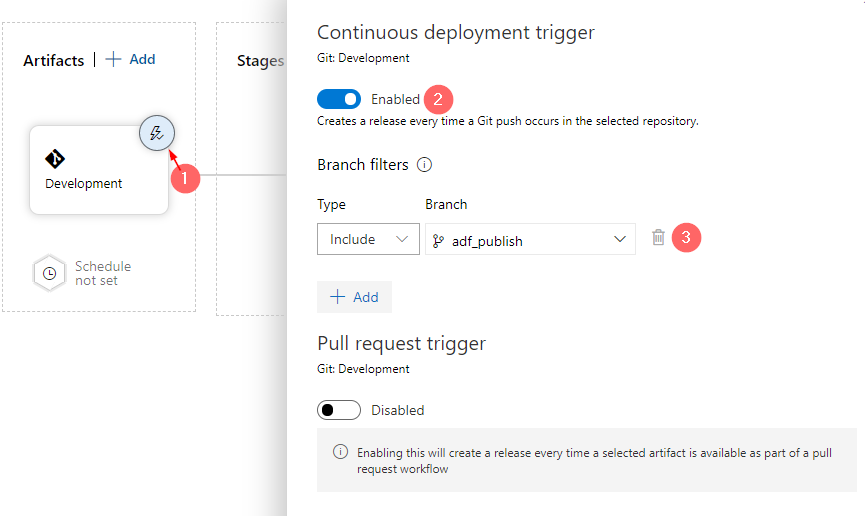
The development stage is created, and a continuous deployment trigger is enabled. Before we proceed to the creation of other stages, let’s save the pipeline:

Step 5. Create remaining stages
Since the development stage is configured and it triggers deployment job on the next stage it is time to configure that job there. In my example it is “Staging” or “QA”:

- Click on a “+” button on Agent Job panel to add a new task (1)
- In “Add tasks” popup window search field enter a keyword “arm” to filter out other tasks (2)
- Add a task “Azure resource group deployment” (3)
- Click on a just added task (4)

In a task configuration pop up window:
- Give a Display name to the task: “Deploy Data Factory” (1)
- Set the correct Azure Subscription (2)
- Choose an Action: “Create or update resource group” (3)
- In a Resource group field fill a variable:
$(resourceGroup). (4) - Select a location (5)
- Choose a template location: “Linked artifact” (6)
- Choose ARM template and template parameter files (7) and (8).
- Override default template parameters by variables that were created previously (9)
- Choose the deployment model: Incremental

- The files to use in sub-steps 7 and 8:

- In a sub-step 9 override parameters by variables this way:
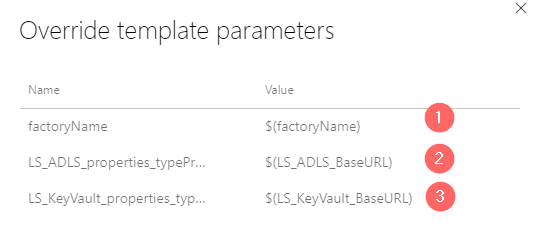
| Parameter | Variable |
| factoryName | $(factoryName) |
| LS_ADLS_properties_typeProperties_url | $(LS_ADLS_BaseURL) |
| LS_KeyVault_properties_typeProperties_baseUrl | $(LS_KeyVault_BaseURL) |
Then click on Save and go back to the pipeline tab and clone Staging environment to a Production:

Click on Save again to keep the latest changes.
The production stage was created just by cloning a staging without extra adjustments or additions. This is because the underlying job was configured by variables which hold pointers to all external references, like resource groups, key vaults, storage accounts.
Another typical requirement is “Pre-deployment” approval. In my scenario, it is configured on a production stage
- Click on “Pre-deployment” conditions icon (1)
- In a pop up window enable “Pre-deployment approvals” (2)
- Provide a list of approvers (3)

Therefore, when Staging deployment is over the execution flow will be in a waiting state for action from an assigned approver. He can react directly from a notification email or by using DevOps portal UI.
Step 6: Map variable groups to stages
This step is necessary to map stage-specific variable values to certain stages. As an example, a variable $(Environment) has a value “prd” if the pipeline a job in a production stage and it set the value to “stg” in case if job triggered in staging.
- Open tab Variables -> Variable Groups (1) and click on “Link variable group” button (2):

- Map variable group “Production” to stage “Production” and select also scope “stage Production” instead of “Release”
- Repeat the same action for “Staging”
- Save the changes

CI/CD pipeline in action
Step 1. Apply a dummy change to a pipeline in a development environment:
- Open a demo01 pipeline
- Drop a new activity to a canvas “Wait”
- Name it: “Wait 1 second”
- Set a description: “Adjustment 01”
- Save and publish changes

The execution of actions listed above triggers a release pipeline
Step 2: Wait when release to staging is complete and approve release to production
- Navigate to Pipeline -> Releases
- The release pipeline should show the progress of deployment into two stages.

- To approve release to production click on this stage in UI and approve it directly

- The last action will result in an unblocked deployment to a production stage. As a result, both stages received the same data factory code as it is now in a master branch and a development environment

Step 3: Inspecting Release Pipeline Logs
Let’s start firstly with logs. There are various ways of how to get into this part of the portal. One of them is to click on a stage knob, just like on a screenshot above the other is to go directly to the “Logs” tab and then choose the right stage using a drop-down control.
The production stage shows that there are two major jobs performed:
- Pre-deployment approval received and processed
- Agent job executed (1) and after downloading the artifacts (JSON files) they are deployed via “Deploy Data Factory task” (2)
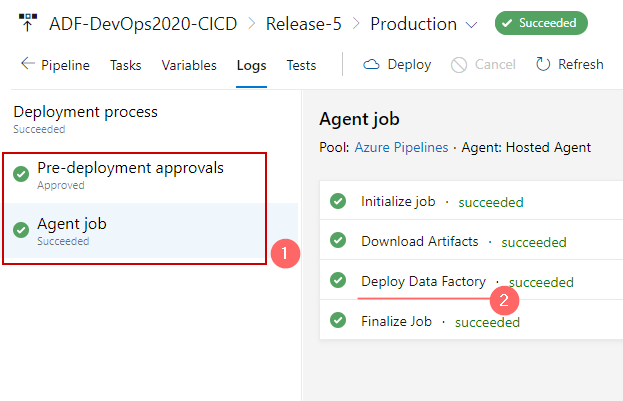
- By clicking on tasks the new pop up window appears with a detailed output of the task execution:

Step 4: Inspecting a Production Stage of Data Factory
After reviewing release logs, let’s open a production instance of our ADF pipeline demo01. It shows that new task added and it is configured the same way as it was done on a development environment:

Final words
This is a final and perhaps the largest post in a series of Azure Data Factory, DevOps and Classic pipelines. It illustrates in a detailed step-by-step way of how release pipelines can be created and configured to enable CI/CD practices in Azure Data Factory environments. It shows limitations and also possibilities that Azure DevOps and ADF can bring if they used together.
The industry moving forward into a “pipeline as code” approach, so YAML is a real and sometimes even preferred alternative now. The basic usage of such pipeline in my subsequent post: Azure Data Factory & DevOps – YAML Pipelines
Many thanks for reading.